Whether you’re planning a kitchen renovation or maximizing storage in an existing space, understanding the difference between a butler’s pantry and a walk-in pantry is the first step to choosing the right solution for your home. These two storage concepts have surged in popularity among homeowners seeking organized, functional kitchen spaces without the visual clutter of cabinets lining every wall. A butler’s pantry walks that line between hidden storage and elegant display, while a walk-in pantry offers pure efficiency and customization. Both can dramatically improve how you organize, access, and display your kitchen essentials, from everyday dishes to bulk groceries and specialty appliances. This guide walks you through the practical differences, design strategies, and implementation tips you need to transform your kitchen into a well-organized, beautiful space.
Table of Contents
ToggleKey Takeaways
- Butler’s pantries and walk-in pantries serve different purposes: butler’s pantry walk-in pantry ideas should prioritize display and entertaining appeal versus maximum storage capacity and efficiency.
- Proper shelving placement—eye-level at 60–66 inches with 12–15 inch spacing—ensures functional storage for both butler’s pantries and walk-in pantries while maintaining visual organization.
- LED lighting with 4000K color temperature and under-shelf task lighting are essential for visibility, food safety, and preventing spoiled goods in both pantry types.
- Vertical space utilization through floor-to-ceiling shelving, over-the-door organizers, and island units in walk-in pantries can double storage capacity in small kitchens.
- Adjustable shelving systems and labeled clear containers allow homeowners to reconfigure storage zones as needs evolve and prevent duplicate purchases and waste.
- Proper ventilation with 4–6 inch passive or active ducts prevents mustiness and mold, while accessibility features like step stools and waist-height item placement support safe, comfortable daily use.
Understanding the Difference Between Butler’s Pantries and Walk-In Pantries
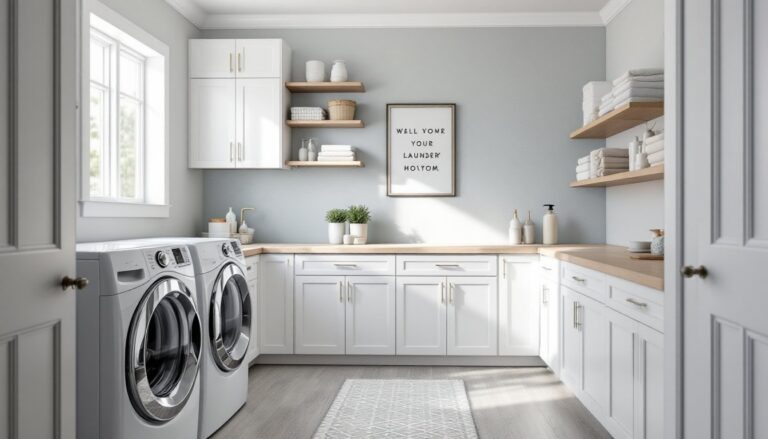
A butler’s pantry is a transitional space, traditionally positioned between the kitchen and dining room, designed to display and serve fine china, glassware, and entertaining essentials. It’s part storage, part statement, with open shelving, glass-front cabinetry, and finished surfaces that make it visually appealing from multiple angles. Think of it as a working room where style matters as much as function.
A walk-in pantry, by contrast, is a dedicated storage room accessed directly from the kitchen. It prioritizes capacity and accessibility over aesthetics. The back of the shelves, walls, and doors can be purely utilitarian, plywood backing, basic paint, exposed studs if needed. Walk-in pantries work best for bulk groceries, kitchen appliances, and ingredients you want out of sight but within arm’s reach.
Choosing between them depends on your kitchen layout, entertaining habits, and storage needs. A butler’s pantry suits homes with an open floor plan and frequent entertaining, where display adds character. A walk-in pantry makes sense in smaller kitchens, galley layouts, or if you simply need maximum storage volume without worrying about visibility. Many homes use both: a butler’s pantry for entertaining essentials and a walk-in pantry for everyday overflow.
Essential Design Elements for a Functional Butler’s Pantry
Layout and Storage Solutions
Start with the bones: a butler’s pantry needs a clear traffic pattern and logical storage zones. Designate one wall or corner for display (glass-front cabinetry, open shelving), another for working storage (stacks of linens, serving utensils, bar supplies), and a prep zone if space allows, a small counter with a sink is the gold standard but not mandatory.
Measure your space carefully. Most butler’s pantries range from 6–12 feet long and 3–5 feet deep, though smaller versions work in tight quarters. Plan for shelves at eye level (60–66 inches from the floor), with clear spacing between shelves of 12–15 inches for most dishware. Deeper shelves (14–18 inches) suit bulk items: shallower ones (8–10 inches) work for glassware. Incorporate pull-out drawers or sliding baskets for items you access frequently, they save you from reaching to the back of a deep shelf.
Consider adjustable shelving systems. They cost a bit more upfront than fixed shelves but let you reconfigure storage as your entertaining style and household needs evolve. Avoid overstuffing: leave 20–30% of shelf space empty for visual breathing room and to prevent items from toppling during daily use.
If you’re installing a sink or appliance (beverage cooler, wine fridge), run plumbing and electrical rough-in before cabinetry goes in. If you’re tying into existing kitchen circuits, confirm capacity with a licensed electrician, installing a second refrigerator often requires a dedicated 20-amp circuit. Always pull a permit for mechanical and electrical work: inspectors want to verify the work before walls close up.
Finishing Touches and Aesthetic Details
A butler’s pantry is visible to guests, so finishes matter. Paint walls a soft neutral or a complementary accent color that ties to your kitchen. Use semi-gloss or satin finishes, they’re easier to wipe clean than flat paint and give a subtle sheen. Pair them with quality hardware on cabinetry: brass, oil-rubbed bronze, or stainless steel hinges and pulls elevate the look without breaking the budget.
Lighting sets the mood and function. Recessed downlights provide even illumination, while under-shelf lighting highlights displayed items and reduces shadows on lower shelves. Install lights on separate switches from the kitchen so you can turn on the butler’s pantry without lighting the whole kitchen. LED options run cool and use minimal energy, important in a confined space.
Flooring should be durable and easy to clean. Porcelain tile, sealed concrete, or luxury vinyl plank withstand spills better than wood. If you prefer hardwood, seal it well and wipe spills immediately. Baseboards and crown molding add polish: even simple, painted trim finishes the space professionally. Resources like 75 beautiful butler’s pantry designs showcase how finishes and lighting transform a utilitarian room into an inviting display space.
Walk-In Pantry Organization Strategies That Maximize Space
A walk-in pantry thrives on intelligent categorization and clear sightlines. Divide contents into zones: baking supplies, canned goods, snacks, paper products, seasonal items, and small appliances. Use the top shelves (72–84 inches high) for items you access rarely or lightweight items like cereal boxes. Middle shelves (36–60 inches) get everyday staples and frequently grabbed ingredients. Lower shelves hold heavier items and bulk goods, reducing strain from lifting.
Install shelving across all wall space, including above the door (perfect for lightweight items in baskets). Deep shelves (18–24 inches) suit a walk-in’s back wall: shallower shelves (12–14 inches) along side walls prevent items from disappearing into dark corners. Adjustable shelving is worth the investment, you’ll reconfigure more often in a walk-in than a butler’s pantry as household needs shift.
Use clear, labeled containers for dry goods. Mason jars, clear plastic bins, or acrylic canisters let you see contents at a glance and know when to restock. Label shelves or use a small whiteboard to track inventory, especially if multiple household members do the shopping. This prevents duplicate purchases and reduces waste.
Take advantage of vertical space with over-the-door organizers for spice packets, tea, or small canned goods. Install a hook rail or pegboard on one wall for hanging shopping bags, kitchen towels, or measuring tools. A narrow rolling cart fits in tight corners and holds seasonal décor, extra pantry stock, or small appliances you use seasonally. Real Simple’s home organization tips offer practical decluttering strategies that apply well to pantry maintenance.
Smart Shelving and Storage Systems for Small and Large Spaces
Shelving type makes or breaks a pantry’s functionality. Wire shelving is affordable, lightweight, and allows airflow, good for rentals or temporary setups, but items can slip through gaps and it looks utilitarian. Wood shelves (solid pine, plywood with edge banding, or hardwood veneers) are strong, attractive, and suit both butler’s pantries and upscale walk-in designs. They support more weight and look finished without extra trim.
Metal frame systems (steel or aluminum) with adjustable shelves combine strength and flexibility. Brands like Metalsistem or Husky offer modular options suited to 12–24-inch depths. They cost more than basic wire but look professional and handle heavy loads without sagging. Install them with a stud finder and lag bolts into wall studs, don’t rely on drywall anchors alone for loaded shelves.
For small spaces, maximize vertical height. Shelves that go floor-to-ceiling (usually 8–9 feet, with 7–8 inches of usable space above the top shelf) reclaim otherwise wasted cubic footage. Use a lightweight step stool, store it in the pantry, to safely access upper shelves. Never stretch or overreach from a standard ladder while holding items: that’s how accidents happen.
In larger walk-ins, island shelving (a freestanding unit in the center) creates a second storage surface and improves traffic flow. Size it at 18–24 inches wide so it doesn’t block the door swing. For butler’s pantries, corner shelves or glass display cases take advantage of angles and create visual focal points.
Don’t overlook the door. Mount shelves, a magnetic spice rack, or slim pull-out organizers on the interior face. A pantry door must swing fully and not block access: confirm the swing doesn’t interfere with adjacent cabinetry or hallways before fastening anything permanent.
Lighting, Ventilation, and Accessibility Considerations
Lighting in a pantry isn’t optional, poor lighting leads to spoiled goods, missed inventory, and frustration. Recessed LED 4000K color temperature bulbs provide daylight-neutral illumination that’s easy on the eyes and shows true food colors. Install fixtures on 3–4 foot centers in a walk-in pantry: one or two fixtures work for a smaller butler’s pantry.
Add task lighting under shelves or above counters if you have a prep zone. Under-shelf puck lights or strip lights cost $20–60 per shelf and install with adhesive backing or small brackets. Wire them to a single switch for convenience. Motion-sensor switches reduce energy use if the pantry sits idle: but, they can be finicky in tight spaces.
Ventilation prevents mustiness and mold, especially if the pantry is fully enclosed. If there’s no existing window, install a passive vent (a louvered duct cap on the exterior wall) or run ductwork to an active exhaust duct. For most residential pantries, a 4–6 inch duct and 50–100 CFM (cubic feet per minute) fan is adequate. Consult local building codes, some jurisdictions require a certain air change rate per hour. If you’re uncomfortable working with HVAC, hire a licensed contractor: improper ducting wastes energy and creates condensation problems.
Accessibility matters, especially in multi-story homes or for aging-in-place designs. Avoid shelves higher than 66 inches if older family members or children use the pantry regularly. Install a sturdy step stool with a top-step rail if you need to access shelves above eye level: never place items on high shelves that people stand on their toes to reach regularly. Keep frequently used items at waist height (30–48 inches) for comfortable access without bending or stretching. Resources like The Kitchn’s kitchen design ideas discuss accessibility alongside aesthetics in modern kitchen planning.
For wider pantry doors, consider a pocket or bifold door to save swing space. Standard 32-inch doors fit most openings: confirm your rough opening before ordering cabinetry. Ensure lighting switches and door hardware are accessible and don’t create pinch points.