Single-wide mobile homes offer an affordable path to homeownership, but their compact layouts demand smart design choices. With thoughtful planning, a mobile home interior can feel open, functional, and genuinely stylish, without busting your budget or requiring major structural work. The key lies in strategic furniture selection, smart lighting, clever color choices, and storage solutions tailored to tight quarters. This guide walks you through proven tactics that work in real mobile homes, covering everything from layout optimization to budget-friendly kitchen and bathroom updates that maximize both comfort and resale value.
Table of Contents
ToggleKey Takeaways
- Multi-functional furniture like storage ottomans and floating desks maximizes square footage in single-wide mobile homes without overwhelming compact spaces.
- Layered lighting with ambient, task, and accent sources, combined with mirrors and light finishes, makes mobile home interiors feel open and significantly larger.
- Light, neutral color palettes with strategic accent colors and continuous flooring materials create visual continuity and expand the perception of small rooms.
- Vertical storage, built-in shelving, and wall-mounted solutions use underutilized wall space to eliminate clutter and improve functionality.
- Budget-friendly kitchen and bathroom updates like fresh paint, new hardware, peel-and-stick backsplash, and cabinet refacing deliver high ROI without requiring full renovations.
- Prioritizing room-specific improvements based on lifestyle—such as kitchen updates for frequent cooks or lighting for home office setups—yields the greatest comfort and resale value in mobile home interior design.
Optimize Your Layout with Multi-Functional Furniture
The first step in making a single-wide feel spacious is choosing furniture that pulls double duty. A sofa with built-in storage, an ottoman that doubles as a table, or a bed frame with under-bed drawers immediately reclaims square footage that would otherwise sit idle.
Consider furniture scale carefully. Oversized sectionals and bulky entertainment centers swallow the room, swap them for loveseat-scale pieces or a slim console that floats in the space. Wall-mounted TV stands and floating desks keep sightlines open and create visual breathing room.
Arrange pieces to define zones without closing them off. A low-profile bookshelf can separate the living area from a sleeping nook without blocking light or views. Avoid pushing all furniture against walls: a floating arrangement with an area rug can actually make the space feel larger and more intentional.
Measure doorways, hallways, and turning radiuses before buying anything. A beautiful sofa means nothing if it doesn’t fit through the front door. Mobile homes often have tighter passages than site-built homes, and returns or damage can derail a project fast.
Lighting Strategies That Brighten and Expand Your Space
Poor lighting makes any room feel smaller and gloomier. Mobile homes, which often have fewer windows than traditional houses, need layered lighting to feel open and welcoming.
Start with ambient light. Replace ceiling-mounted fixtures with recessed lights or flush-mount options that don’t hang down and eat headroom. If you’re renting or avoid permanent changes, consider temporary adhesive-backed puck lights or track lighting installed on existing canopies.
Add task lighting near work areas: a clip-on lamp over the kitchen counter, wall sconces flanking a bedroom mirror, or pendant lights suspended over a dining zone. These focused sources make spaces feel intentional and prevent dark corners that shrink perception of area.
Incorporate accent lighting with low-voltage LED strips behind floating shelves or along baseboards. This draws the eye around the room and creates depth. Keep bulbs warm (2700K) in living spaces and neutral white (4000K) in kitchens for natural, energizing light without harshness.
Mirrors and light-colored surfaces amplify whatever light you have. A large mirror opposite a window or light source bounces illumination across the room and makes walls feel further away. Shiny finishes on backsplashes, furniture, or accent walls reflect light without overwhelming the space.
Color Palettes and Finishes That Enhance Small Spaces
Color choices make or break a small space. Light, neutral basecoats, soft whites, pale grays, or warm creams, visually expand walls and keep the eye moving. They also serve as a backdrop for bolder accents without claustrophobia.
Choose one or two accent colors and use them sparingly: a painted feature wall, throw pillows, or artwork rather than painting the entire room. Deep or saturated colors can work if applied strategically, a dark accent wall receding into the distance actually pushes that wall back visually.
Keep trim, doors, and ceilings light and consistent. Painting interior doors, doorframes, and baseboards the same color as walls erases visual breaks and creates continuity that stretches the eye horizontally and vertically. Horizontal stripes or paneling can also open up a narrow room by widening the visual field.
For flooring, continuous material (vinyl plank, laminate, or light tile) flows better than patchwork. A consistent floor color or wood tone ties rooms together. Layered area rugs add warmth without sectioning off zones too rigidly.
Finish selection matters as much as color. Matte finishes absorb light and can feel flat in cramped spaces, while satin or semi-gloss reflects light and adds depth. Apply this principle to walls (satin paint over matte), cabinet fronts, and hardware. You’re not going high-gloss-shiny, just slightly reflective enough to bounce light around.
Storage Solutions to Eliminate Clutter
Clutter is the enemy of small spaces. A single-wide with visible items, loose papers, and overflow from cabinets feels instantly cramped. Smart storage systems hide mess and maximize every inch.
Start with the low-hanging fruit: vertical storage. Shelving, pegboards, and wall-mounted cabinets pull items off the floor and use underutilized wall space. Adjustable shelving lets you customize heights for different items and adapt as needs change.
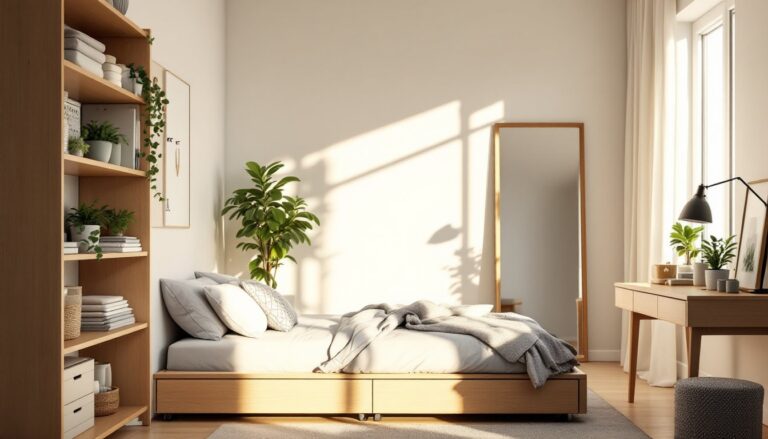
Underbed storage containers, closet organizers, and drawer dividers turn dead space into asset. A murphy bed or wall bed can reclaim an entire room if a dedicated bedroom isn’t available or if one room pulls double duty as an office.
Kitchen and bathroom cabinets are usually tight, so invest in pull-out drawers, tiered shelf risers, and vertical dividers. A single cabinet can hold twice as much with proper organization. Open shelving (real or floating) works in kitchens if styled consistently: keep like items together and invest in matching canisters or containers.
Closets in mobile homes are notoriously small. Add an additional rod at half-height to double hanging space, use shelf dividers, and hang shoe organizers on the inside of the door. In a small bedroom without a dedicated closet, a narrow wardrobe cabinet or open clothing rack styled attractively beats a pile of clothes.
Built-In Shelving and Wall-Mounted Options
Built-in shelving maximizes corner space and awkward walls that wouldn’t fit traditional furniture. Floating shelves (properly anchored to studs or using heavy-duty wall brackets rated for your wall type) add visual lightness while providing real storage.
Measure twice and locate studs before anchoring anything. Mobile homes typically have wood-framed walls with studs every 16 inches on center: use a stud finder to confirm and use structural-grade fasteners rated for your wall material. Drywall alone won’t hold much weight, always anchor to studs or use specialized anchors like toggle bolts for heavy loads.
Corner shelving and L-shaped units use otherwise wasted corner space. A tall, narrow bookcase in a corner takes up minimal floor space while providing significant storage. Angled or corner cabinets under sinks or in awkward spots retrieve otherwise unusable area.
Wall-mounted desks, fold-down tables, and murphy shelving systems transform a dead wall into functional workspace. These pieces drop up when needed and tuck away when not, freeing floor space that a permanent desk would claim.
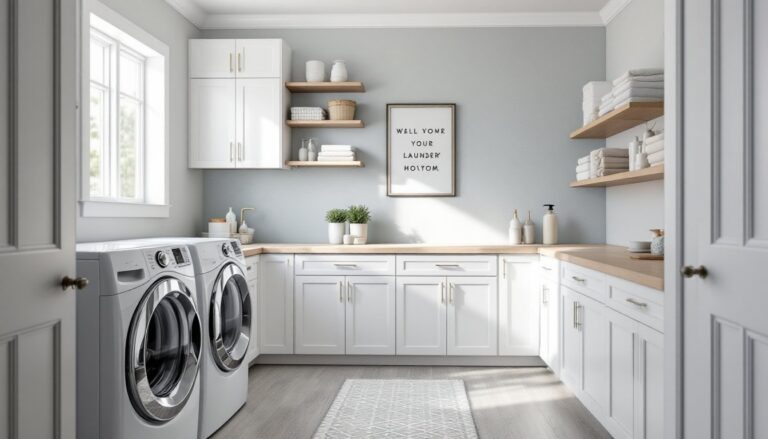
Kitchen and Bathroom Updates on a Budget
Kitchen and bathroom upgrades have the highest ROI in small spaces because they’re used constantly and affect daily comfort. The good news: you don’t need a full gut renovation.
Start with cosmetics. Fresh paint, new hardware (cabinet knobs and pulls are inexpensive and make a dramatic difference), and updated lighting completely transform a tired kitchen for under $500. Replace old fluorescent fixtures with warm LED options that feel inviting rather than institutional.
Countertop overlays, vinyl, laminate, or thin quartz sheets installed over existing counters, cost a fraction of full replacement and are often DIY-friendly. Some come peel-and-stick: others require contact cement and careful placement. Measure your current counter carefully and confirm the overlay accommodates your sink and appliances.
Backsplash updates work similarly. Peel-and-stick tile, adhesive-backed vinyl, or thin stone veneers go over existing surfaces in a weekend. Before applying, clean thoroughly with trisodium phosphate (TSP) to remove grease and grime that prevents adhesion. Allow underlayment to acclimate to room temperature for 24 hours before installation.
For bathrooms, similar logic applies. New mirrors, updated vanity hardware, and fresh caulk refresh the space instantly. Recaulking alone, removing old, cracked caulk and applying new, clean lines, is free labor that transforms a dated bathroom. Use quality silicone caulk rated for wet areas and smooth with a wet finger for professional results.
If your mobile home was built in the 1990s or earlier, cabinet materials and finishes may feel outdated. Cabinet painting or refacing (thin veneers over existing boxes) costs less than replacement. Cabinet paint is specialized, use products rated for laminate or wood and apply primer designed for slick surfaces to ensure adhesion. Sanding isn’t always required if you use bonding primers, but prep work (cleaning, deglossing if needed) is critical.
Drawer and cabinet interiors benefit from felt liners (affordable, self-adhesive rolls) that protect contents and reduce noise. Lazy Susans and pull-out organizers make deep cabinets accessible without reaching to the back.
Budget considerations: labor costs vary regionally, and material prices fluctuate with market conditions. A kitchen cosmetic refresh might run $800–$2,500, while a full remodel with new cabinetry and countertops could reach $8,000–$15,000. Professional installation is worth the cost for any project involving plumbing, electrical, or load-bearing changes: cosmetic updates like painting, backsplash, and hardware are solid DIY territory if you’re comfortable with basic tools.
Site resources like budget home makeovers, small space living ideas, and budget home renovation stories offer step-by-step visual guides for common updates that aren’t site-specific.
Conclusion
A single-wide mobile home is a blank canvas, not a limitation. Thoughtful layout, strategic lighting, smart color choices, functional storage, and targeted updates create a home that’s both comfortable and stylish. Prioritize what matters most to your daily life, if you cook often, invest in kitchen updates first: if you work from home, nail the lighting and desk setup. Small changes compound: fresh paint plus new hardware plus better lighting doesn’t cost thousands, but transforms the entire feel. Start with what you can do yourself, tackle one room at a time, and measure twice. Your mobile home can feel twice as large with half the effort.