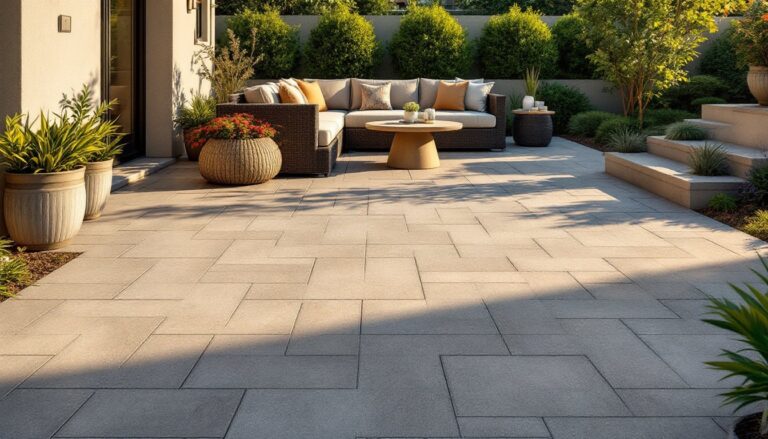
A fire pit turns a patio from functional outdoor space into a destination, a place where people actually want to gather year-round. Whether you’re drawn to the warmth of a crackling fire, the ambiance of flickering flames, or simply a focal point for weekend entertaining, patio fire pit ideas range from permanent stone installations to portable solutions that fit tight budgets and smaller lots. This guide walks through eight proven approaches, covering the practical details, materials, installation complexity, safety concerns, and cost realities, so you can choose what actually works for your space and skill level.
Table of Contents
ToggleKey Takeaways
- Patio fire pit ideas range from permanent stone installations costing $400–$1,500 to portable metal bowls under $200, letting you match your budget and space constraints.
- Built-in stone fire pits create a timeless centerpiece that anchors outdoor seating, but require excavation, local permits, and 10–15 feet clearance from structures before starting.
- Portable metal fire bowls offer flexibility for renters and small spaces with zero installation—just place on level ground with non-flammable pavers and maintain a 10-foot clearance from structures.
- Sunken fire pit designs improve wind protection and naturally draw guests in with built-in seating, though they demand proper drainage to prevent rust and water pooling.
- Gas fire pits ($200–$5,000+) deliver clean heat and precise flame control without ash or smoke, making them ideal for year-round entertaining with minimal maintenance.
- Safety is non-negotiable: maintain 10 feet clearance from structures, use non-flammable ground cover, keep a fire extinguisher nearby, and never leave fires unattended—check local codes before installation.
Built-In Stone Fire Pits: Permanent Beauty and Durability
A masonry fire pit, typically constructed with stacked stone, brick, or concrete block, creates a timeless centerpiece that looks intentional and built-to-last. The appeal is real: these pits age gracefully, develop character, and anchor an outdoor seating area in a way portable options can’t match.
Construction usually involves excavating a shallow basin (12 to 18 inches deep), laying a level base of compacted gravel, and stacking walls either with fire brick and high-temperature mortar or decorative stone held together with standard mortar. A grate or ring insert (typically 18 to 24 inches in diameter) sits inside to contain the fire. The entire project can take a weekend for a simple 3-foot-diameter pit, longer if you’re incorporating a seating wall or decorative stone veneer.
Expect to check local codes before starting. Some jurisdictions require minimum clearances from structures (typically 10 to 15 feet), setback from property lines, and even permits for permanent installations. You’ll need basic masonry tools, a trowel, level, cold chisel, and a rubber mallet, plus safety glasses and gloves. Stone and mortar aren’t forgiving if you miscalculate, so spend time on layout and leveling before committing mortar. Cost typically runs $400 to $1,500 depending on stone choice and diameter.
Portable Metal Fire Bowls: Flexibility and Easy Installation
For renters, tight spaces, or folks who like to rearrange, a free-standing metal fire bowl or fire ring is the practical answer. These range from simple steel rings ($50 to $150) to designer copper or cast-iron bowls that cost several hundred dollars. No digging, no permits, no permanent damage, just place it on level ground and light a fire.
Metal fire bowls come in various sizes, from 24 inches to 36+ inches in diameter. Smaller bowls suit intimate gatherings or apartments with patios: larger ones handle groups comfortably. Look for designs with a stable three-leg base or a wide foot ring to prevent tipping, especially if you live in a windy area. Ensure the bowl sits on pavers or non-flammable ground cover, not directly on grass or mulch, to protect the ground from heat damage.
Portable pits work well with a removable spark arrestor (a metal screen or grate that covers the top) and a lid to smother the fire when done. Some models rust over time unless treated with high-temperature paint or stainless steel construction, so factor maintenance into your decision. Setup takes minutes, but keep a garden hose or fire extinguisher nearby and maintain a 10-foot clearance from low-hanging branches and structures. Cost and ease make this option ideal for testing whether a fire pit fits your lifestyle before committing to a built-in design.
Sunken Fire Pit Designs: Creating Intimate Outdoor Gatherings
Dropping the fire pit below grade, sinking it 18 to 36 inches into the ground, creates an intimate gathering spot and improves wind protection, making the fire burn hotter and more stable. Sunken pits also naturally seat people on the surrounding ground level, a built-in social arrangement that draws guests in.
A basic sunken pit involves excavating a circular basin, lining the walls with fire brick or concrete block mortared in place, and installing a metal grate or ring insert at ground level. The key is proper drainage: water pooling at the bottom ruins the pit and invites rust. Slope the basin slightly toward a drain hole dug 6 to 12 inches deeper than the pit’s lowest point, then backfill with gravel to encourage water flow away from the structure. If your water table is high, this approach may not work, consult local codes and consider hiring a landscape professional if you’re unsure.
Edging options include stacked stone, poured concrete, or a built-in bench running partway around the rim. The wider the surround, the more comfortable the experience, aim for at least 3 feet of usable seating space. Sunken designs look more polished and purposeful than ground-level rings, but they demand better site planning and more excavation effort. Cost typically ranges from $600 to $2,500, depending on the pit size, edging materials, and whether you hire help for digging and drainage work.
Modern Linear and Contemporary Fire Features
Contemporary outdoor design leans toward clean lines, minimalist aesthetics, and multi-functional features. A linear fire feature, a long, narrow channel or trough that runs along a seating area or deck edge, delivers modern sophistication and lets you define spaces without traditional circular or square pit footprints.
Linear pits are often integrated into outdoor kitchens, deck edges, or water features. They can run on natural gas, propane, or wood (though wood versions require more creative venting). A stainless steel or powder-coated steel trough, filled with ceramic logs or lava rock and fed by a concealed gas line, delivers flame as accent rather than primary heat source. This works beautifully in climates where entertaining stretches into cooler months but full-day heating isn’t essential.
These designs demand professional installation if gas-powered, running underground or through-deck gas lines requires permits and licensed work. DIY is possible for wood-burning troughs in simple configurations, but you’ll still need proper spacing from structures and adequate ventilation. Aesthetic impact is high: practical warmth is modest. Costs vary wildly ($1,000 to $5,000+) depending on materials, fuel type, and whether you hire professionals. For a modern home or a property where design cohesion matters, the investment often pays off in curb appeal and ambiance.
Eco-Friendly Gas Fire Pits: Clean Heat Without the Ash
Natural gas or propane fire pits appeal to folks who want heat and ambiance without the ash, smoke, and ongoing wood sourcing. Flame control is precise, turn it up for warmth, dial it down for mood. Many municipalities favor gas over wood-burning, and fewer permits apply, though that varies by jurisdiction.
Portable propane pits ($200 to $1,000) use removable tanks, no installation required. Permanent gas pits ($1,500 to $5,000+) connect to underground or deck-mounted lines and often integrate into outdoor kitchen spaces. Natural gas costs less to run than propane and offers continuous supply, but it requires a gas line installed by a licensed professional. Propane is easier for retrofits and works anywhere, but you’ll swap tanks regularly.
When shopping, look for CSA-certified burners and quality construction. Cheaper units heat unevenly or consume excessive fuel. Stainless steel or powder-coat finishes resist weathering. Fill the pit with ceramic logs or lava rock, which distribute heat and create realistic flame effect. Safety is straightforward: ensure clear clearance around the burner, keep a dry powder fire extinguisher nearby, and never use water on a gas fire. Running costs are minimal compared to wood, and cleanup is zero. For entertaining predictability and low maintenance, gas pits earn their price tag.
DIY Budget-Friendly Fire Pit Solutions
Not every fire pit requires hundreds of dollars or specialized tools. A DIY pit using affordable materials can be functional, safe, and frankly more satisfying to use because you built it.
The simplest approach: a steel ring or fire ring (18 to 36 inches diameter, $30 to $150) placed on a bed of pavers. No excavation, no mortar, no skills needed. Lay down 4 to 6 concrete pavers, set the ring on top, and you’re done. Add a grate insert to keep logs controlled and improve airflow. This meets safety standards and costs under $250 total. For a step up in permanence, build a cinder block or fire brick pit. Stack blocks to a height of 18 to 24 inches (no mortar required, friction holds them), set a metal ring insert on top, and top with a grate. Material cost runs $150 to $300. It’s not fancy, but it’s solid and took an afternoon.
For a rustic look, an old truck bed ring or wagon wheel, filled with sand, gravel, and a fire ring insert, works too, especially on a tight budget. Whatever your approach, never skip clearance (10 feet minimum from structures and trees), use fire brick or steel, never allow fires to sit directly on wood or mulch, and keep a hose within reach. Ideas for fire pits for year-round coziness in your yard provide additional inspiration if you’re exploring options. DIY pits prove you don’t need a contractor’s budget to enjoy the warmth and character a fire pit brings.
Safety Tips and Design Considerations for Your Patio Fire Pit
A beautiful fire pit is useless if it endangers your home or guests. Start with clearances: pits should sit at least 10 feet from structures, fences, and overhanging branches, 15 feet if vegetation is low. Check your local fire code, many areas specify larger setbacks or require permits for permanent installations. Call your local building department before breaking ground: a quick phone call beats a citation.
Ground prep matters enormously. Never place a fire pit on mulch, grass, or bare soil. Use a bed of non-flammable material, concrete pavers, gravel, or crushed rock, extending at least 3 feet around the pit. This prevents ground heating and grass fires. Ensure proper drainage if you’re digging: standing water rots metal rings and invites rust.
When using the pit, keep children and pets supervised. Maintain a fire extinguisher and garden hose nearby. Never leave a fire unattended, and fully extinguish flames before leaving or sleeping, water the ashes, stir them, and confirm no embers remain. Wear appropriate clothing (nothing loose that might catch flame) and keep hair tied back. Use eye protection if tending the fire actively, and wear gloves when handling grates or adding wood.
Design-wise, consider sightlines and how the pit fits into your overall patio layout. A pit that anchors a seating arrangement feels intentional: one plopped randomly looks abandoned. Positioning it slightly downwind of your main seating area keeps smoke from blowing across guests. Shade considerations matter too, a pit under a pergola or near shade trees provides cooler refuge on hot days while framing views. Southern Living and Gardenista offer thoughtful examples of how fire pits integrate into cohesive outdoor spaces. Take time planning placement before installing: moving a permanent pit later is impractical.